Description
In this VFX project, I learned and practiced using the Niagara System in Unreal Engine 5. With this system, I created a fireball spell consisting of 4 distinct stages:
-
1st phase: Initial ignition & burning
-
2nd phase: Accelerated burning
-
Flying with trailing effects
-
Explosion
During this project, I utilized Dynamic Material Parameters and Scratch modules to make it easier to customize the fireball’s visual effects at different stages. I also performed various fine-tuning and optimizations, such as refining curves and particle logic, which I will explain in more detail below.
In addition to the Niagara System, I used Photoshop to improve material-related details—for example, enhancing black-and-white smoke textures and creating reflection textures for the fireball’s transition effects between stages.
I also created and edited several Animation Sequences to synchronize the fireball casting animations with the character’s spellcasting actions.
Finally, I implemented some Blueprints setup in UE to allow the player to summon and cast the fireball toward the mouse direction, with collision detection triggering the explosion effect at impact.
Result
Phase 1 - Initial burning
In the first stage of the Fire Spell VFX, I implemented the initial ignition effect of the fireball using two emitters:
-
A flame emitter to represent the burning fire.
-
An ash emitter to simulate embers and ash particles generated during combustion.
One of the key challenges in this stage was making the flame dissipation and erosion feel natural. While the UV map provided some base-level erosion, the effect wasn't convincing enough on its own.
To achieve a more organic flame fade-out, I modified the material using a combination of Subtract and Saturate nodes. This setup allowed the normalized age of the particle to interact with the alpha values of the texture, effectively controlling the particle's opacity over time.
Additionally, I used the Dynamic Material Parameters module within the particle system to drive the erosion effect. By assigning a custom curve to the normalized age and introducing randomized values per particle, I was able to create a more varied and believable flame dissipation, avoiding overly uniform fading behavior.
Phase 2 - Accelerated burning
The second stage of the fireball effect is relatively straightforward. In this phase, I created a User Parameter to enable external control—primarily from Blueprints—over the main body of the black fire.
This User Parameter, named second_phase, is a customizable float value that drives several key properties of the emitter, including:
-
Velocity
-
Particle lifetime
As shown in the setup below, the “B” input of the Lifetime module is driven by this second_phase parameter. This setup allows for dynamic adjustment of the black fire’s behavior during runtime, enabling greater flexibility and interactivity in the visual effect.

To make the ash particle sizes more random—with a bias toward smaller particles—I adjusted the Sprite Size curve.
Since Normalized Age is always 0 in Initialize Particle, I changed the Curve Index from Normalized Age to Random Range Float. This allows the curve's X-axis to sample random values between 0 and 1.
By shaping the curve to favor smaller values, I achieved a more natural scattering effect with more small particles and occasional larger ones.

Phase 3 - Flying Trail
To create the black-rimmed effect during flight, I used many overlapping white spheres with black edges, forming a soft white-gray core with a dark outline.
Steps:
-
Created a new material instance (based on the original black fire material)
-
Original material used Subtract for soft erosion; for flight, I needed a sharper black edge
-
Enhanced edge contrast by:
-
Adding a Power node to sharpen the falloff
-
Creating a new Particle Parameter to control the Power value dynamically
-


To sharpen the black edge, I applied a Power operation to the texture’s alpha channel.
Using a Power value less than 1 reduces soft falloff and makes the edge more defined. This enhances the rim contrast during flight.
Phase 4 - Explosion
Explosion VFX – Velocity, Color Shift, and Size Logic
-
Scattering Logic
-
Used "Velocity from Point" to make particles scatter outward from the emitter center.
-
Initial speed is 0; velocity increases after explosion triggers.
-
-
Visual Behavior
-
As white particles scatter outward, they gradually grow in size and shift to black.
-
-
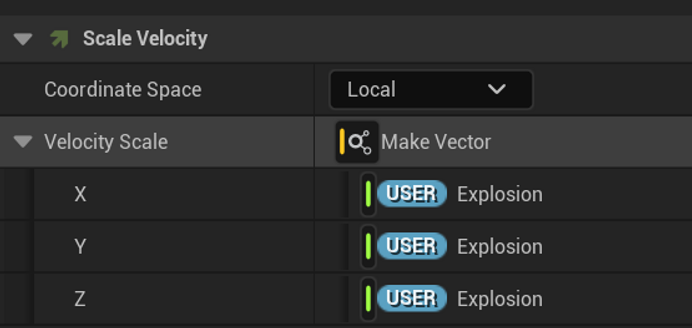
Scale Velocity
-
Created a User Parameter to control Scale Velocity inside the Particle Update stage.
-
All XYZ values in Scale Velocity are driven by this parameter, which can be adjusted in Blueprint.
-
Scratch Module Logic
-
Color Shift Based on Distance
-
Used a Scratch Module to check distance between each Particle Position and Emitter Position.
-
Used a Distance node, then applied If/Select logic:
-
If distance > threshold → set particle color to black
-
Else → keep original color
-
-
Final result goes to the Particle Color output.
-
-
Size Increase Based on Distance
-
As particles move outward, their size increases based on distance.
-
To avoid uncontrolled growth, the distance is multiplied by a small float before being added to size.
-
Again used If/Select:
-
If distance > threshold → increase size
-
Else → keep original size
-
-
Final result goes to the Particle Size output.
-

The explosion is composed of multiple layered effects, each timed and styled for maximum visual impact:
-
Explosion Beams (start at 0.0s)
-
Thin, stretched beam particles
-
Aligned with velocity direction (Sprite Renderer → Alignment → Velocity Aligned)
-
-
Explosion Rings (Black & White) (start at 0.1s)
-
Created two material instances (from the dynamic parameter-based master) to control dissipation
-
White ring is smaller than black ring: uses different Sphere Location radius and velocity
-
White flame fades into black by using Scale Color, setting RGB to 0 at ~0.4
-
Set rendering order to avoid occlusion: White ring = 1, Black ring = 0
-
-
Explosion Embers (start at 0.0s)
-
Used to add heat residue and dynamic glow
-
-
Explosion Refraction (start at 0.0s)
-
Created previously (will introduce later), adds a heatwave/distortion effect for visual realism
-
-
Explosion Smoke (starts at ~0.25–0.4s)
-
Flipbook handles fade and color internally
-
No need for dynamic parameters or color scaling in material or particle settings
-

Extra Techs
Refraction VFX
Explosion Ripple – Refraction Material Setup
-
Create Normal Map in Photoshop
-
Import a cloud-like normal map
-
Use Polar Coordinates filter to convert it into a circular ripple shape
-
-
UE Material Setup
-
Import the normal map into Unreal Engine
-
Create a Translucent material
-
Enable Refraction, set it to Pixel Normal Offset
-
Set Refraction value = 0
-
-
Control Refraction Area (Ripple Only)
-
By default, the whole image refracts—so we use masks to isolate the ripple:
-
Use Sphere Gradient as a mask:
-
Black (0) = refract
-
White (1) = no refraction
-
Apply OneMinus (1 - x) to invert the mask
-
-
Add a second Sphere Gradient with a smaller radius to mask out the center
-
Use Add node to combine both gradients, creating a ring mask
-
-
Final Output
-
Connect the combined mask to the Refraction input
-
Result: Only the ring-shaped ripple area has refraction; edges and center remain unaffected
-


In Niagara, I noticed the refraction ripple disappears abruptly. This is because the material’s Alpha is always 0, so the Scale Color Alpha curve doesn’t affect visibility.
To fix this, I used a Lerp node to blend between:
-
A normal ripple texture (bumpy for refraction)
-
A flat normal map (pure blue, no refraction)
The Lerp is driven by the Particle Alpha from the emitter.
As the particle’s alpha fades (via the Scale Color curve), the material smoothly transitions from ripple to flat normal, achieving a natural fade-out of the refraction effect.

EmberGen Flipbooks
For all the flipbook textures that I used in Unreal 5 Niagara System are made by EmberGen.


